tech.jpg)
The Amiga 500 has two expansions slots, one in the bottom of the machine - also known as the "trapdoor" - and one on the left hand side of the machine. The slot behind the trapdoor is the one that most Amiga 500 owners will be familiar with; it is the one where the 0.5 MByte memory expansion lives that was usually the first expansion people bought for their 500. It is not only suitable for memory expansion; card with more functionality found their way into the trapdoor slot as well, like for example the KCS Power PC board hardware PC emulator.
The expansion slot on the left hand side of the machine was used less often. In most cases where it was actually used it was to connect an external hard disk controller. The Amiga 500 does not have an internal hard drive controller like the later 600 and 1200 models and even if it had, there is not enough space inside the machine to fit a hard disk from that era. Hard disk controllers for the Amiga 500 therefore came with their own enclosure in which in most cases the hard disk could be mounted as well.
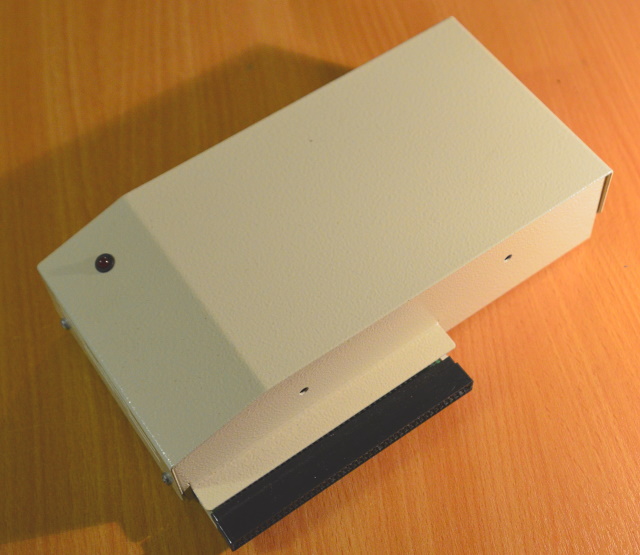
One example of such an external hard disk controller for the Amiga 500 is the "Multi-Evolution 500" made by the German company MacroSystem, shown below.
MacroSystem
During the early 90s MacroSystem was the manufacturer of a large range of Amiga expansions including the Maestro and Toccata 16 bit sound cards, the Medusa Atari ST emulator and the V-Lab motion non-linear video editing card. Their video editing systems for the Amiga were so successful that after Commodore's demise MacroSystem went on to create their Amiga clone, which they called "Draco". The Draco was not cheap and was aimed at the (semi-)professional video editing market. Later on the Draco was superseded by a system named "Casablanca", which was based on the x86/PC architecture.
The company still exists and has remained active in the digital video editing space. Their website can be found at www.macromotion.info.
Multi-Evolution 500
The Multi-Evolution 500 provides not only the controller hardware and space for the hard disk itself, it also provides a RAM expansion. MacroSystem's previous hard disk controller product for the Amiga 500 was the "Evolution 500", which did not provide RAM expansion nor did it provide space for the hard disk itself. To indicate that their new product had more functionality than the old one MacroSystem added the "Multi" prefix to the name. The controller parts of both products are pretty much the same and the hard disk configuration software that came with my controller always calls it the "Evolution", even though officially it is a "Multi-Evolution".
The RAM expansion uses SIPP memory modules, which tend to be quite rare nowadays. They use the same pinout as the more usual 30 pin SIMMs, but have little legs soldered to them where the SIMM version just has contact pads:
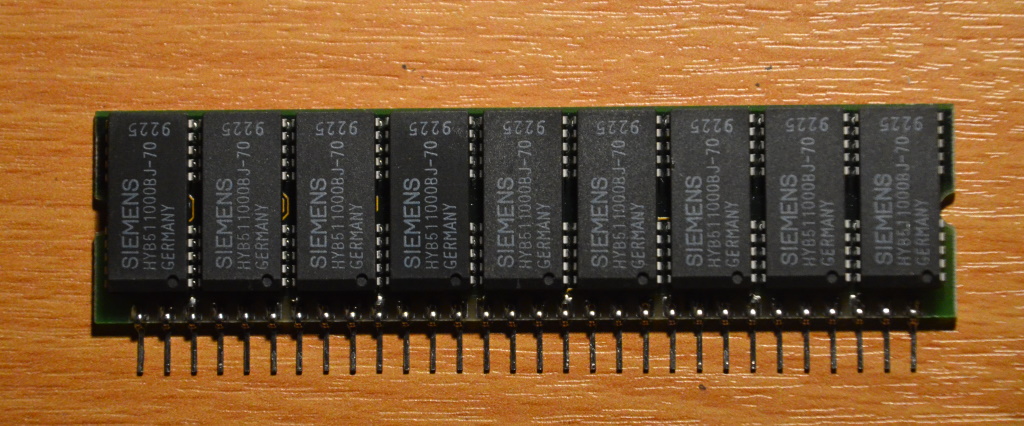
My Multi-Evolution has two SIPP modules of 1MB each, giving the Amiga an additional 2 MB of Fast RAM. This memory is called "Fast RAM" since it can only be used by the processor and not by the custom chips. The processor therefore never needs to wait for the custom chips to finish their access, which makes the access much faster. The memory controller also supports using two modules of 4MB each to give the Amiga 8 MB of Fast RAM, which is the maximum the Amiga 500 supports. The controller has a jumper setting to indicate which of the two sizes of memory module is installed.
The hard drive interface used is of the SCSI type. This at the time was a faster interface than the cheaper IDE interface that was used by PC clones. The Amiga was not the only system adopting the SCSI standard, systems made by Apple and Sun also used SCSI. While the IDE interface was designed to support two internal devices, the SCSI bus was designed as an internal as well as external bus that allows up to 8 devices to be connected (one of which is the controller) and since it was designed with external devices in mind a lot of these devices will come with their own case and power supply. This was ideal for Amiga 500 owners.
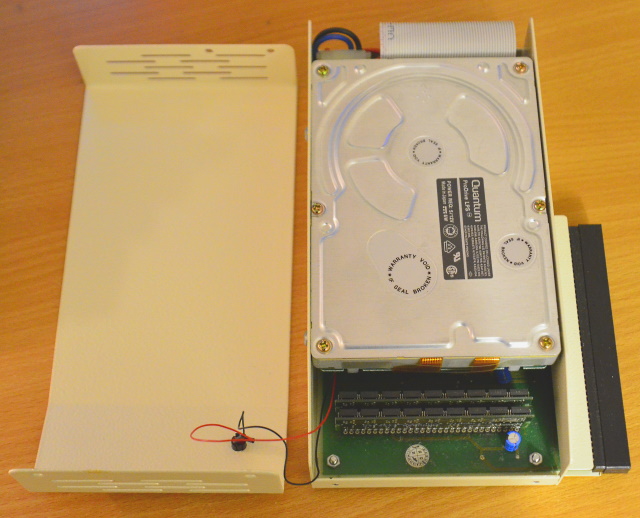
The Multi-Evolution controller has an internal SCSI connector for connecting the hard drive that is mounted inside the controller's case. The photograph above shows my controller, which came with a Quantum LPS52 installed with a size of 52 MB. Today that sounds like small fry, but software in those days did not require that much space and 52 MB for me was pretty vast. At the top of the photograph the ribbon cable for the SCSI bus can be seen sticking out of the back of the hard drive.
Interestingly the manual warns against installing any other brand of hard drive in the enclosure as apparently only devices from Quantum's LPS range ran cool enough not to cause problems by overheating. From experience I can say that with the LPS52 installed the metal enclosure gets pretty warm during normal use, especially during the Summer. But never hot enough to give cause for concern or to keep my coffee warm.
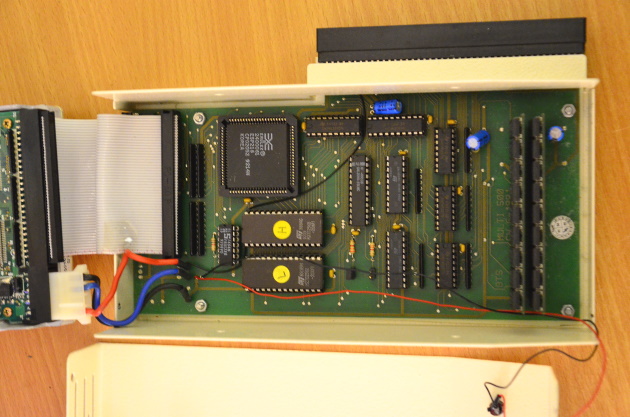
The following photo shows the contents of the controller with the hard drive moved out of the way. The standard disk drive power connector and the 50-pin ribbon cable that provides the internal SCSI connection can now clearly be seen.
On the back of the Multi-Evolution's case there is an external SCSI connector that can be used to plug in other devices. These other devices can usually be daisy-chained, which then allows the Amiga 500 to control devices like ZIP drives, tape drives, magneto-optical drives and of course CD drives. However, being able to plug in one of these devices is only one step of the way; without a matching driver the device may still not actually be any use to the Amiga.
Autoconfig
The Amiga 500 Kickstart ROM does not know about hard drives and therefore always expects to boot from the internal disk drive. To allow the system to use unknown expansion hardware during boot the Amiga uses a system called "autoconfig". This allows expansion hardware to provide an initialisation routine to be run at boot time. In the case of a hard disk controller this routine can then be used to install the required drivers and by doing so allow the Amiga to boot from the hard disk directly after power up.
Unfortunately a bug in Kickstart 1.2's implementation of autoconfig prevents it from being used by hard drives. The solution to this is to boot from a floppy disk that installs the required drivers in the Amiga's memory and then reboots the Amiga so that the system now can boot from the hard drive. Booting from floppy is only required after each power up of the system; any subsequent resets the Amiga should be capable of booting from the hard drive directly. In Kickstart 1.3 this bug was fixed and the boot floppy no longer required.
Unsurprisingly, the Multi-Evolution controller also supports autoconfig, but interestingly the manual mentions that booting from hard disk directly after power up will also work for Kickstart 1.2, despite of the bug. The Evolution family of controllers therefore never require the dance with the boot floppy. The autoconfig of the Evolution installs the "evolution.device" for low-level access to the SCSI controller and it installs the "FastFileSystem" so that AmigaDOS can manipulate the files and drawers on the devices attached to the controller.
Partitioning
Before a new hard drive can be used it needs to be partitioned and the partitions need to be formatted. On the floppy disk that comes with the controller there is a program named "SCSIInstall" that performs these actions. The program uses a text interface to ask questions about the required setup of the hard drive. It is a question and answer system, with no use of menus or icons. This sounds cumbersome, but is not as difficult as it sounds since the program provides sensible defaults for each question. We only need to provide an answer to a question if we don't want to use the default, otherwise pressing return is enough to accept the default. This also works for a hard drive that has already been setup since the defaults shown in the program will be the values that are currently in use by the drive.
At the start of the program it asks us which device we want to setup. If only one device is recognised by the controller then the program will have selected that as the default.
At some point the program will ask if the Amiga's interrupts should be disabled during the transfer of hard disk data since this can speed up the transfer rate considerably with certain hard drives. The downside of this could be that data transfer on the serial port gets corrupted. Back in the day I always had the interrupts disabled during transfers since I did not use the serial port for large data transfers. But nowadays I like to use AmigaExplorer to transfer data between my PC and my Amiga 500 using a serial cable. Having the SCSI controller disable all interrupts while transferring data from the PC to the hard drive on the Amiga caused the PC to continuously disconnect from the Amiga. As soon as I changed the setup of the controller to allow interrupts during data transfers everything worked fine again.
The floppy also contains a program called "SCSIBoot", which allows us to select which partition on which drive should be used to boot the system from. The program opens a window that has a button for each partition found on the drive(s). Clicking one of the buttons then selects that partition as the system's boot partition.
Multiple devices
The controller can be used with up to 7 SCSI devices at one time. To remember which devices are active the "SCSIInstall" program will store the number of detected devices on the boot record of each of the devices. On each power up the controller will wait for the device(s) to become active and will read the boot record of the first device on the bus to do so. This will then tell the controller how many other devices should be on the bus and wait for them to become active (if any). The benefit of this is that it makes the boot process as fast as possible since it removes the need to wait for non-existent devices.
To add new devices to the system the "SCSIInstall" program will perform a full scan off the SCSI bus and detect any new devices that may not be part of the current setup.
The one down side of this system is that the controller will wait indefinitely for a device that is no currently present. This could for example be an external hard disk that is not powered up when not required. When this happens the boot process of the Amiga is stuck on the controller logo screen while the controller software is showing that it is waiting for other devices to come online. When this happens holding down the Amiga's "Help" key will stop the detection process and make the controller boot with whichever devices it has detected at this point.
Performance
The Multi-Evolution install floppy came with a hard disk performance tester, which gave the following numbers:
File create/delete: create 18 files/sec, delete 166 files/sec
Directory scan: 125 entries/sec
Seek/read test: 179 seek/reads per second
r/w speed: buf 512 bytes, rd 133293 byte/sec, wr 28111 byte/sec
r/w speed: buf 4096 bytes, rd 370085 byte/sec, wr 183424 byte/sec
r/w speed: buf 8192 bytes, rd 524288 byte/sec, wr 287281 byte/sec
r/w speed: buf 32768 bytes, rd 655360 byte/sec, wr 480263 byte/sec
r/w speed: buf 131072 bytes, rd 838860 byte/sec, wr 610820 byte/sec
r/w speed: buf 524288 bytes, rd 873813 byte/sec, wr 731564 byte/sec
For me at the time the main performance boost came from not having to constantly swap disks while using the system. And the 2MB fast RAM in the controller also helped as I now had enough RAM to open Deluxe Paint without having to close Asm-One. Everything I needed was now one click away on the Workbench screen from where it would load in seconds. This really transformed the Amiga 500 for me into a much more efficient tool for writing school related papers and pursue my programming hobby.
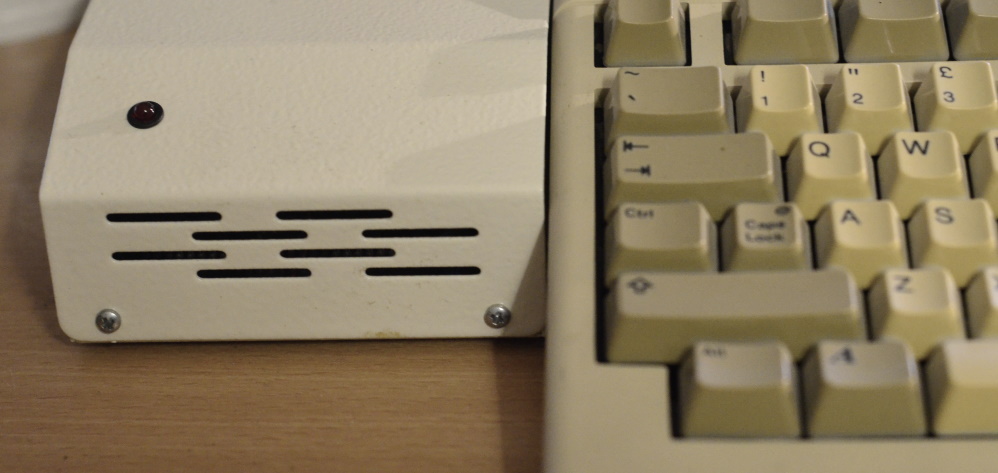
The only drawback was the incredible racket made by the Quantum hard drive in the enclosure. I've heard a lot of drives over the past decades but can honestly say that it is by far the loudest drive I've ever personally used. The fact that it sat directly next to the keyboard and not in a box under the desk did of course not help either. I remember turning my Amiga 1200 on for the first time and being amazed at the quietness of its Seagate hard drive (still a 3.5 inch). The Seagate really was not that quiet at all, but compared to the Quantum? Bliss.
The Multi-Evolution will make a re-appearance in one of the next articles coming soon...